In the world of business management, QuickBooks has established itself...
Read More
QuickBooks is very excellent accounting software with payroll and many features. It is faced by a user when the QuickBooks software is not accepting the Bank ID. It can disrupt the working of the user. In this article, we are discussing its symptoms, reasons for occurrences and its possible solutions to terminate this QuickBooks is Unable to Verify the Financial Institution Information for This Download Error, just stick to this solutions:
What are the Symptoms of QuickBooks is Unable to Verify the Financial Institution Error?
Some of the symptoms are here below:
- Users are not able to check the Financial Institution Information.
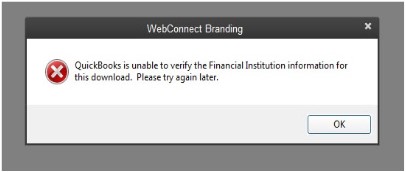
- You will get a message window reflecting this error on your screen.
- You are not able to link your bank account to the QuickBooks Desktop.
What are the Causes of QuickBooks is Unable to Verify Financial Institution error?
Below mentioned reasons are the major possible causes behind this error:
- An older version of the QB used by the user made him counter this error.
- If the Bank Account or credit card of the user or company is not authorized by QuickBooks now.
- When the file (.qbo file) Web Connect is corrupted.
- Due to the information written on the web connect files is not displayed.
- When the financial institution is no longer support the file which you want to import in the QB.
- If you import an incorrect file in the QB then you can get this error.
How to Fix QuickBooks Error: “Unable to verify the financial institution”?
It is very easy to fix this error by considering the best methods mentioned below for QuickBooks is Unable to Verify the Financial Institution Information for This Download:
- Check the Bank Notification
- Create a Test File
- Switch Banking Modes
- Review the file using the Bank
- Using the Banks website directly download the Web Connect File
- Access QB in Notepad or Excel
Detailed steps of the above-listed methods are mentioned below, but before that remember the following mentioned points and then apply these methods to cure this problem:
- Make a backup file of the company.
- Upgrade the QB software.
- Update the Internet Explorer.
- Check the bank account.
Method 1:- Access QB in Notepad or Excel
To open the QB in Notepad or Excel follow the mentioned instructions:
- Initially, open the file of the QB Online in Notepad or Excel.
- Visit the 20 – 2002 line.
- Now delete the last 4-digits and write 3000 in place of that.
- Save the changes.
- At last, upload this file in QB.
Method 2:- Using the Banks Website Directly Download the Web Connect File
If you are getting this error while importing the file Web Connect then follow the steps mentioned below:
- Initially, open the official website of the bank.
- Sign in to your account.
- Find the.QBO file.
- Download & save it on the system desktop.
- Open QB now.
- Open the “File” menu.
- Now follow the path:
- Utilities–>
- –>Import –>
- –> Web connect file.
- Search for the file.
- Open it.
- Follow the instructions displayed on the screen to import the wizard to import the files.
Note: If you are facing any issue while importing the file then contact your bank or reset the bank connection.
Method 3: Review the File Using the Bank
If the error persists then one should check the file which is downloaded from the Bank’s website with the extension “.qbo”. If you found that the file is different then one should open the website of the bank then download the.QBO file quickly. Now open QB and try to open the QB file. Check whether the error persists or not.
Method 4: Switch Banking Modes
If you want to terminate this error then you can perform the steps of this method as mentioned below:
- Open QB quickly.
- Choose the menu “Banking”.
- Visit the option “Bank Feeds”.
- Now it turns to choose the option “Change Bank Feeds Mode”.
- Select the icon “Classic mode” by visiting the section “Bank Feeds”.
- Now import the.QBO file in the QB.
Method 5: Create a Test File
Initially, you need to create a test file then you have to check that you can import the transactions to a new file of the company. To do so steps areas, follow them:
- Initially, open QB.
- Go to the option “File menu”.
- Now choose the option “New Company”.
- Late on, select the option “Express Start”.
- Enter the details in the respected fields.
- To the company name, enter the word “Test Company” to make it remember easily.
- One should import the “.QBO” file in the test company file which is newly created.
- Now import the transactions within the main company file and likewise in the same bank account in which you are having issues.
Method 6: Check the Bank Notification
If you made any changes then it will be notified to you. To check the bank messages then login into the bank account using the bank official website. If there is any problem you can measure then take a serious turn and resolve it quickly.
Related Articles:-
![How to Fix QuickBooks Error 1603? [Installation or Updating HTML Error]](https://quickfixbookserror.com/wp-content/uploads/2023/12/QuickBooks-Error-1603-1024x576.jpg)


 1-877-589-0392